
 2583
2583
This document will step through preparing for and installing the GPCR server and Admin Client software, and assumes MS SQL Server is installed on a separate, accessible server, using default settings.
Configuring Active Directory
Set who is allowed to access the GPCR client and what computers will have their data collected.
- Create a security group in the domain (e.g. GPCR Admin) and populate it with and administrators that require access to the GPCR client (admin console)
- Create a security group in the domain (e.g. GPCR Computers) and populate it with individual computers or other computer groups (e.g. Domain Computers) that will participate the compliance reporting.
Configuring SQL Server
Set server Authentication
Authentication must be set to allow both SQL and windows authentication
- Open “Microsoft SQL Server Management Studio” and connect to your server instance
- Right-click on SQL server instance and click “Properties”
On the Server Properties page click on the “Security” tab and set the Server authentication to “SQL Server and Windows Authentication”

- Click OK to Close
- If changed, restart MSSQLSERVER service
Create DB Admin
Create an administrative SQL account within SSMS to own and access the GPCR database.
- Expand “Security”, right-click “Logins” and select “New Login”
On General tab
- Set Login name, e.g. “GPCR_DBAdmin”
- Select radio button “SQL Server authentication” and set password
Uncheck “Enforce password policy”

Click on “Server Roles” tab and select “public” and “sysadmin” roles

- Save and close
Create Empty DB
GPCR requires an empty SQL database be present during the installation
In Microsoft SSMS, right-click on “Databases” and select “New Database”
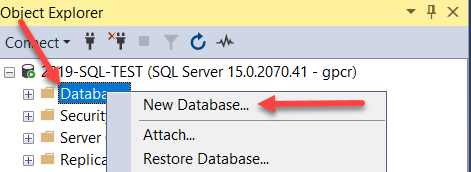
- Enter name for database (e.g. GPCR)
- Set Owner as DB admin created earlier (GPCR_DBAdmin in example)
- Place DB and log files where desired, if different from default
- Save and close
Ensuring Connectivity
Ensure communication is open between GPCR Client and SQL server
Enable DTC
The following is run on both the PolicyPak GPCR Client computer (Where the Admin Console is installed) and the remote SQL Server
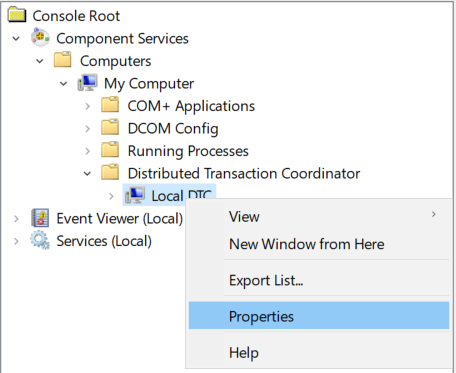
Open Component Services
Open the “run” box (Win-R), type “dcomcnfg” and click OK

Expand Console Root -> Component Services -> Computers -> My Computer -> Distributed Transaction Coordinator, Right-Click on Local DTC and click Properties
On the Security tab -> Security Settings and Configure as follows:
- Check “Network DTC Access”
- Check “Allow Inbound” and “Allow Outbound”
- Select “No Authentication Required”
- Check “Enable SNA LU 6.2 Transactions”
Click OK

- The MSDTC service will need to be restarted for the changes to take affect – Click YES to restart now or NO to restart manually later.
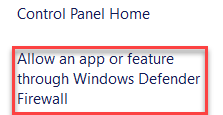
Enable Firewall Rules
Enable DTC through the firewall on both PolicyPak GPCR Server and the remote SQL Server
- Open the Windows Defender Firewall
Click on “Allow an app or feature through Windows Defender Firewall”
Find “Distributed Transaction Coordinator”, check and check the appropriate Network profile (e.g. Domain).

- Click OK to save and close
Installing GPCR
When installing GPCR, download the latest bits from PolicyPak. It is our recommendation that when downloading the latest software version, to grab “everything” (latest bits plus Paks, manuals and guidance). They can be found at https://portal.policypak.com/downloads/everything
GPCR Server
These steps assume that this is the first time GPCR has been installed. If previously installed, you will also be prompted to choose between the previously configured database and admin group, and the setting new values for each.
- In the downloaded ISO or ZIP, open “PolicyPak Group Policy Compliance Reporter” folder and run PolicyPak GP Compliance Reporter (Server).msi
- Click “Next >” through first screen
- GPCR requires that Server and client (admin console) be at version 20.3.2366.420 at minimum. select “Yes, I confirm” and “Next >” to continue
- Accept agreement and “Next >” to continue
- Change installation or just click “Next >” to accept default (recommended) and continue
Click “Change” and find domain security group created earlier (GPCR Admin in example) and click “Next >”

Select “Microsoft SQL Server and “Next >”

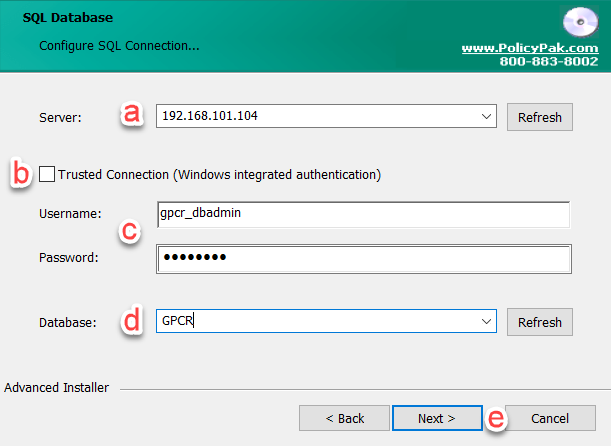
Configure Connection to SQL Server
- Server = Hostname or IP address of SQL server
- Uncheck “Trusted Connection …”
- Type in Username and password of SQL account created earlier
- Click “Refresh” to get list of Databases on SQL server and select empty DB created earlier
Next >
- Install -> click yes if prompted for *.msi
GPCR Client
The GPCR Client (Admin Console) can be installed on any computer. It is recommended that it be installed on the computer that is used for Group Policy Administration.
Note: The client itself is not licensed and thereby can be installed on as many computers as required.
- In the downloaded ISO or ZIP, open “PolicyPak Group Policy Compliance Reporter” folder and run PolicyPak GP Compliance Reporter (Admin Console).msi
- Click “Next >” through first screen
- GPCR requires that Server and client (admin console) be at version 20.3.2366.420 or higher. Select “Yes, I confirm” and “Next >” to continue
- Accept agreement and “Next >” to continue
- Change installation or just click “Next >” to accept default (recommended) and continue
- Select desired application shortcuts and click “Next >”
- Install -> click yes if prompted for *.msi
GPCR General configuration
For information on completing the GPCR configuration wizard, setting up Auditing and Licensing, and for general usage, please refer to the manual. In addition, review the KB video Installing Compliance Reporter Server and Client

