
 5740
5740
Group policy can be used to assign screensaver configurations where desired. However, if you want to implement a custom slideshow, i.e. dictate the images to be used for the screensaver, a bit of extra work and a reference computer is needed to accomplish the task.
The tasks involved are:
- Implement a script to download the images to each user’s computer
- Use a reference computer to configure and save image storage location
- Configure Group Policy Screensaver options
Prerequisites
The following is assumed:
- The images are located on a share accessible to necessary users
- A workstation is available to use to extract encrypted registry information
Create script to copy images
PolicyPak Script Manager can be used to copy the images from a network share to the user’s computer. Although they can be accessed by the screen saver on a network share, thereby eliminating the need for this script, they would not be accessible if the computer were away from the network.
In this example the source directory is \\dccore\share\SSImages\* and the destination is %userprofile%\Pictures\SSImages\.
- Create new Group Policy Object were required
- Expand Computer Configuration -> PolicyPak and click on Scripts Manager
-
Add a new Collection, giving it a descriptive name (e.g. Screensaver scripts or Houston Screensaver…) and click OK


Note: If rolling out different images for different sets of users, ILT may be set on collection to specified different groups of users or computers.
- Double-click to enter Collection
-
Click on "Add New Policy" and NEXT on first page

-
On the "On apply action" screen, either click File -> Open and browse for a preconfigured script or click down-arrow by "(None)", select the appropriate type of script and either paste or type in the script to copy the image files.
 OR
OR 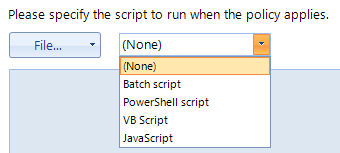
Sample script using powershell that will 1; check for the existence of the destination, 2; Create the destination if it does not exist and 3; copy the files over.

if (!(Test-Path -Path $env:userprofile\pictures\SSImages\))

	{

	New-item -path $env:userprofile\pictures\ -Name SSImages -Itemtype directory

	}

Copy-Item \\dccore\share\SSImages\* -Destination $env:userprofile\pictures\SSImages - On "On revert action" screen, leave as-is and click NEXT
-
Ensure "Always" is selected and click NEXT

- Give a descriptive name to the policy, set item-level targeting if required and click FINISH
Get Custom Location Information
The path to the image location is saved in the Registry as an encrypted value. Use the steps below to create the path, export the value, and make it usable.
-
On your reference computer, set the screensaver to use "Photos", click on Settings and Browse to the location of the Screensaver images

- Click SAVE to close the Photo Screen Saver settings window and then OK to finish
- Open Regedit and search HKCU Values for "EncryptedPIDL"
- Export "Screensaver" registry key
-
Open the .REG file in text editor (I recommend something like Notepad++ that has a larger maximum line size) and edit the following:
- Delete lines for "Speed" and "Shuffle" configuration
-
Remove all line-breaks for "EncryptedPIDL" – data must be on one line

It will end up looking something like this…

Create Group Policy Object
Once the prep-work is completed, we can create the Group Policy Object to 1; Import the .REG settings and 2; set the Screensaver configuration options as per your requirements.
Enable and configure The Screen Saver
Here we are configuring the Screensaver options to your requirements.
- Open your existing Group Policy Object
-
Expand Computer Configuration -> PolicyPak and click on Administrative Templates Manager

-
Add a new Collection, giving it a descriptive name (e.g. Screensaver scripts or Houston Screensaver…) and click OK

Note: If rolling out different images for different sets of users, ILT may be set on collection to specified different groups of users or computers.
- Double-click to enter the Collection
-
Add new policy

-
Set the Scope Filter to "User Policy" or "All Policy"

-
Create required policies – Screensaver Policies are kept under Users -> Admin Templates -> Control Panel -> Personalization.
Setting Policies in PolicyPak land is the same as Group Policy
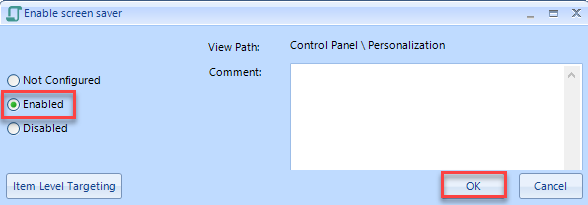
- Double-click open the setting
- Enable, set any configuration Options
-
OK to close
The following are the minimum policies required
- Enable Screen Saver - Enable
- Force Specific screen saver – Enable and set executable name to "%systemroot%\system32\PhotoScreensaver.scr"
- Password protect the screen saver – Enabled
- Screen Saver timeout – Enabled, set timeout value to desired length in Seconds (default is 900 (15min), 300 is 5 min)
- Once all policies have been enabled and configured, click CLOSE in the bottom-right corner
Configure the Custom Path
- Expand Computer Configuration -> PolicyPak -> Scripts Manager and click on the collection created earlier
- Add a new policy and NEXT on first window
-
Select "Apply this policy to all users who log on to the computer (switched Mode)" and click NEXT

-
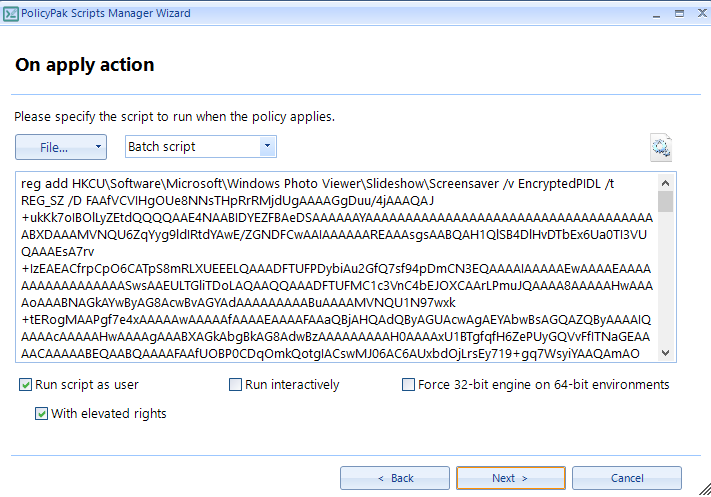
Select "Batch script" from the drop-down menu and either type in or copy the script below to import the .REG file, replacing the /D value (LongEncryptedText…) with the very long encrypted path value from the exported .REG key.
Command to import the registry data using REG.EXE:
reg add HKCU\Software\Microsoft\Windows Photo Viewer\Slideshow\Screensaver /v EncryptedPIDL /t REG_SZ /D LongEncryptedText… -
Select "Run Script as user" and "With elevated rights" and click NEXT
-
NEXT again
-
Select "Once" and click NEXT

-
Give it a descriptive name (e.g. "Screensaver Path"), ensure it is enabled and click FINISH


